

1. WebRTC Versions
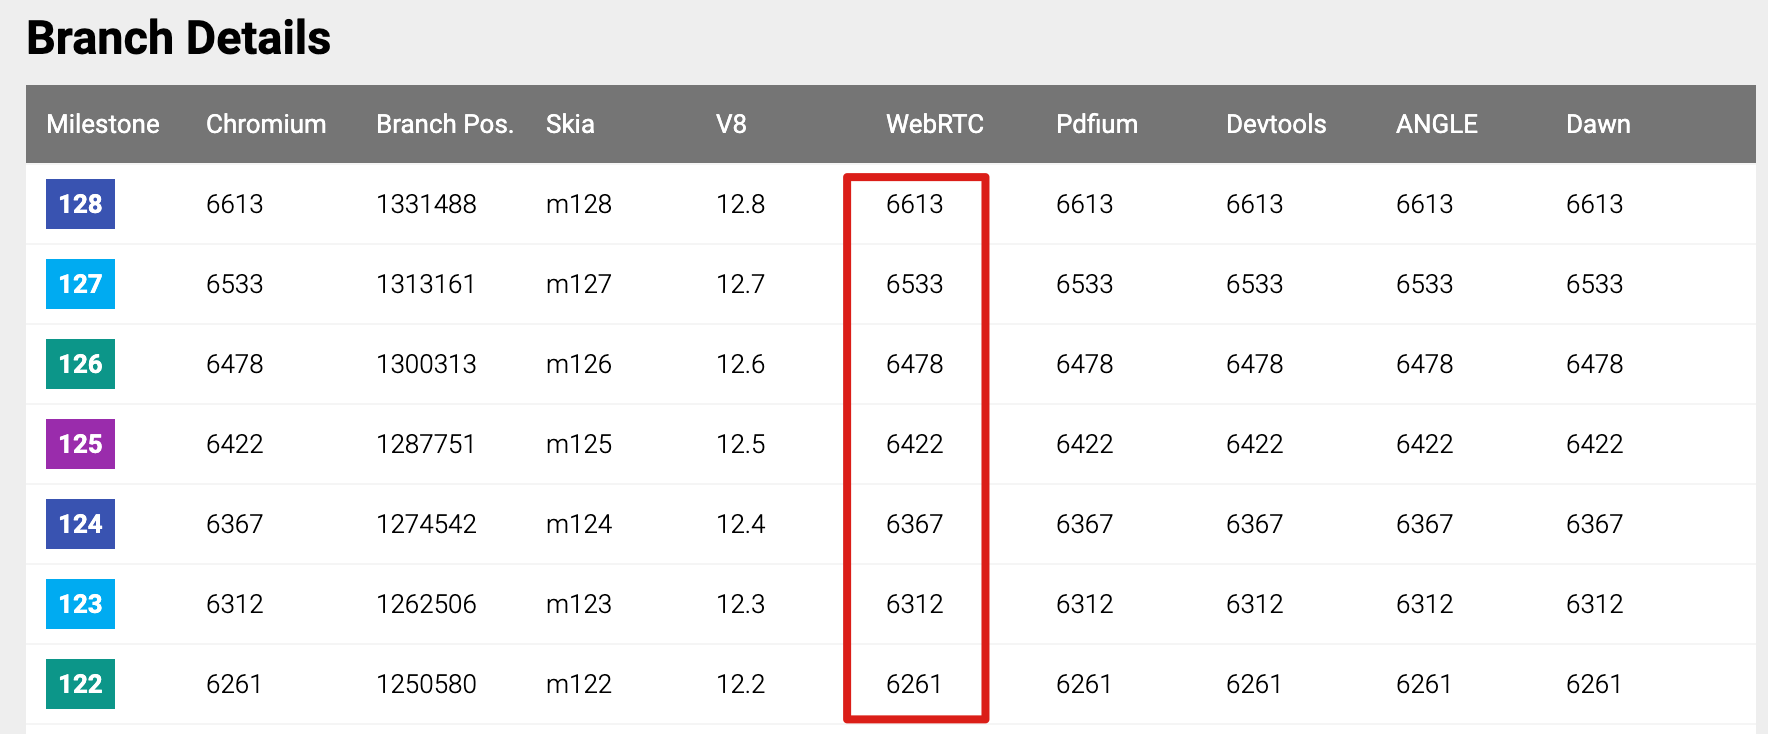
WebRTC versions and corresponding branch-heads are listed on Chromiumdash. The latest was M128 at the time of writing.
2. Downloading the Code
Create a webrtc directory. Google repositories are not reachable from mainland China without a proxy.
2.1. Proxy Configuration
Create an http_proxy.boto proxy config file in the webrtc directory:
[Boto]
proxy=127.0.0.1
proxy_port=7890  # 端口根据自己配置的代理工具来
Declare the proxy
export NO_AUTH_BOTO_CONFIG=~/webrtc/proxy.boto
Configure git proxy
Edit ~/.gitconfig and add:
[http]
	proxy = 127.0.0.1:7890
[https]
	proxy = 127.0.0.1:7890
Configure terminal proxy
Mainly for curl, wget, and Python scripts:
export https_proxy=http://127.0.0.1:7890 http_proxy=http://127.0.0.1:7890 all_proxy=socks5://127.0.0.1:7890
2.2. depot_tools
Clone the repository and add depot_tools to your PATH. Commands like gn, gclient, and ninja live there.
git clone https://chromium.googlesource.com/chromium/tools/depot_tools
Edit ~/.zshrc or ~/.bashrc and add the following. Adjust the path to your install location.
# depot_tools
export PATH="/Users/admin/repos/tools/depot_tools:$PATH"
Verify configuration:
source ~/.zshrc
which gclient
Reference
2.3. iOS and MacOS
fetch --nohooks webrtc_ios
gclient sync --with_branch_heads
2.4. Android
Run the following in the webrtc directory:
fetch --nohooks webrtc_android
gclient sync --with_branch_heads
2.5. Windows
fetch --nohooks webrtc
gclient sync --with_branch_heads
2.6. All Platforms
To fetch code for all platforms at once, create a .gclient file with the following. target_os lists every platform to fetch.
solutions = [
  {
    "name": "src",
    "url": "https://webrtc.googlesource.com/src.git",
    "deps_file": "DEPS",
    "managed": False,
    "custom_deps": {},
  },
]
target_os = ["ios", "mac", "android", "win", "unix"]
Then run:
gclient sync --with_branch_heads
The .gclient_entries file is auto-generated next to src and lists all WebRTC dependency repositories.
If download fails, check proxy settings and run
gclient syncagain until it reaches 100%. {: .prompt-info }
About gclient
It syncs all repositories in a solution. Common flags:
-f,--force: force update unchanged modules;--with_branch_heads: clone branch_heads refspecs in addition to default refspecs;--with_tags: clone git tags in addition to default refspecs;--no-history: do not fetch git commit history;--revision <version>: check out a specific version;--nohooks: do not run hooks after sync.
3. Switching Branches
After gclient sync --with_branch_head, you will see branch heads like below.
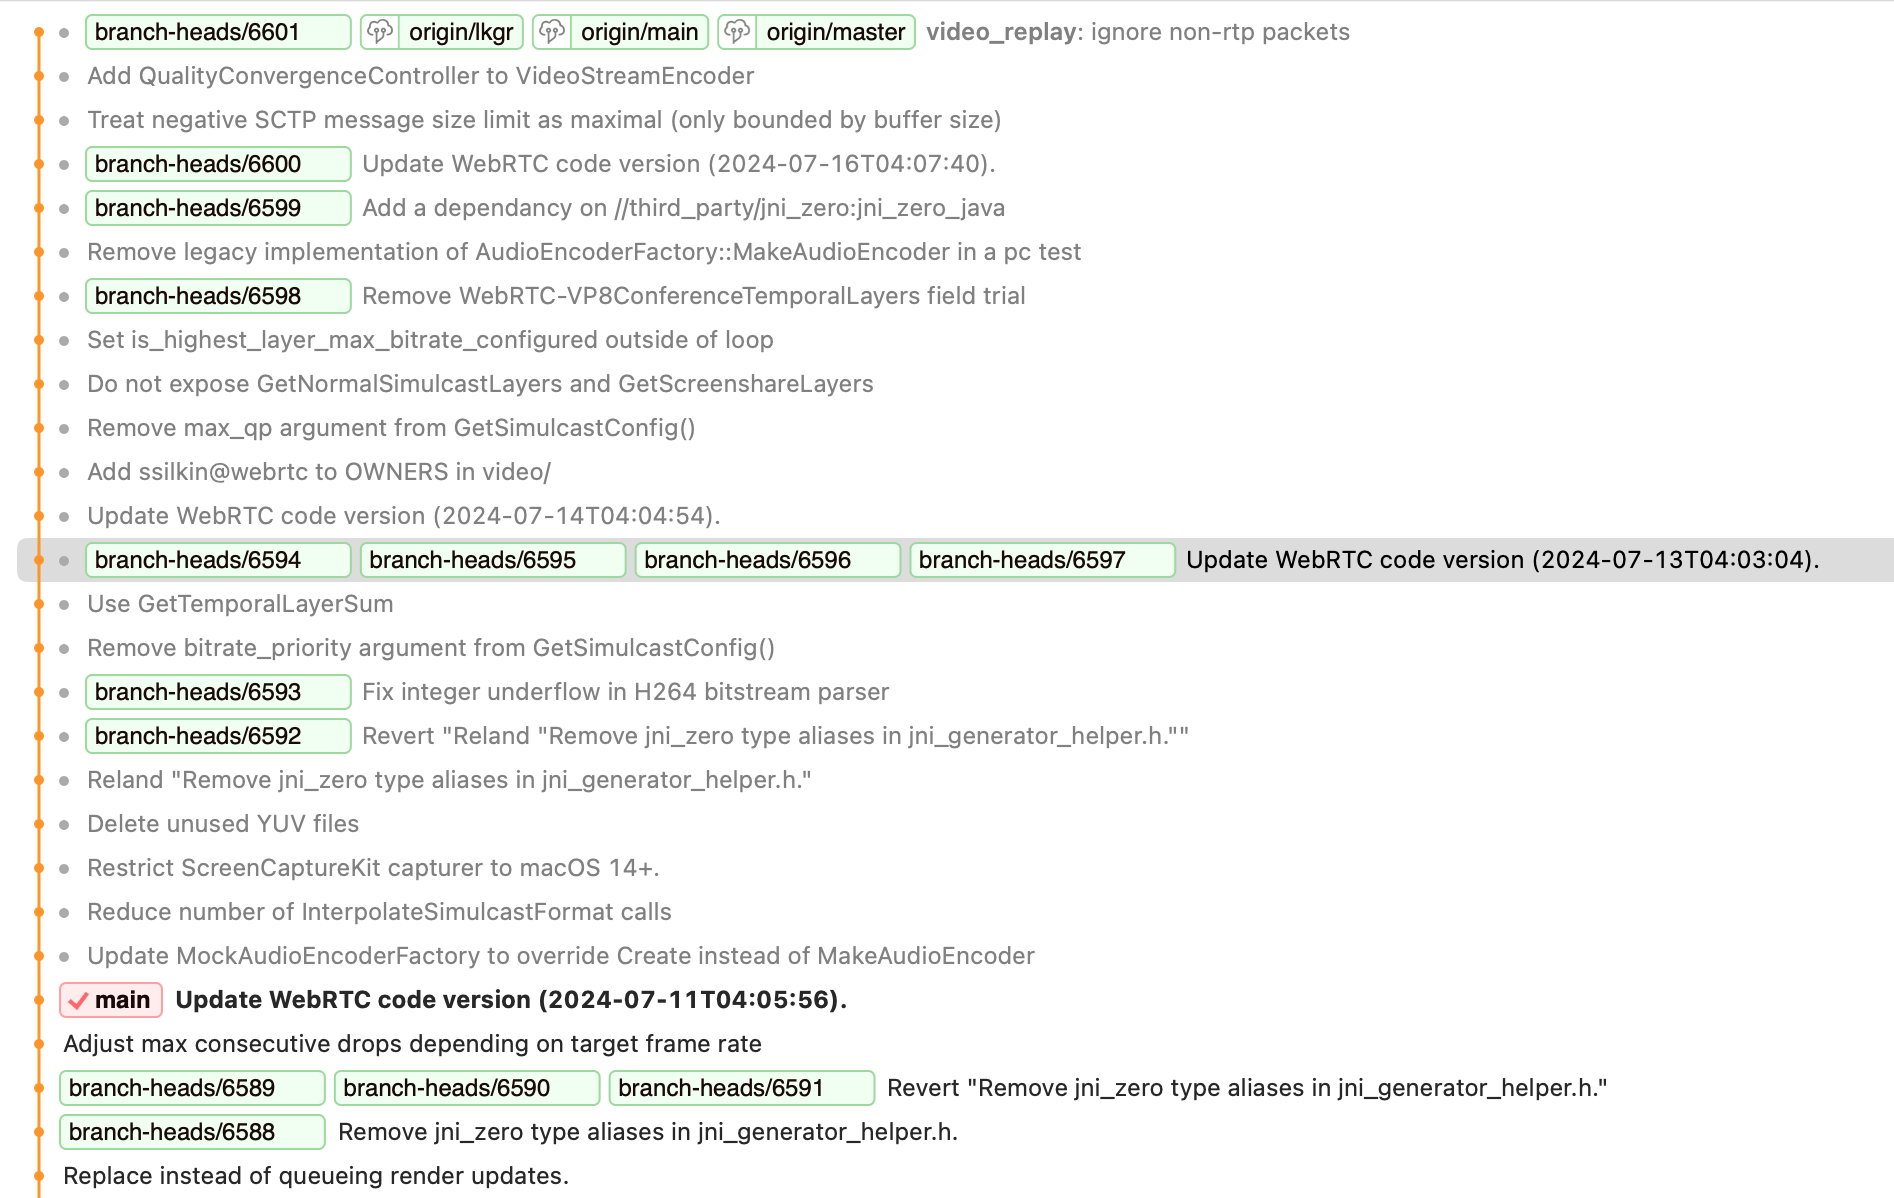 fetched branch_heads
Switch branch
# webrtc src 目录
cd src
# 创建m128对应的 branch-heads/6633 分支
git checkout -b M128/6613 branch-heads/6613

# 同步该节点依赖的三方库,必须要执行
gclient sync --nohooks
4. Building
4.1. iOS
Generate project
# debug build for 64-bit iOS
gn gen out/ios_64 --args='target_os="ios" target_cpu="arm64" ios_enable_code_signing=false'

# debug build for simulator
gn gen out/ios_sim --args='target_os="ios" target_cpu="x64" ios_enable_code_signing=false'
Build
ninja -C out/ios_64 AppRTCMobile
Build with Xcode
# 生成xcode工程
gn gen out/ios --args='target_os="ios" target_cpu="arm64" ios_enable_code_signing=false' --ide=xcode
# 打开xcode工程
open -a Xcode.app out/ios/all.xcworkspace
ios_enable_code_signing=falseavoids code signing errors when generating the project. See end of article for more gn options. {: .prompt-info }
4.2. MacOS
Generate project
Apple Silicon:
gn gen out/mac_debug --args='target_os="mac" target_cpu="arm64"' --ide=xcode
Intel Mac:
# xcode
gn gen out/mac_debug --args='target_os="mac" target_cpu="x64"' --ide=xcode
Build
ninja -C out/mac_debug AppRTCMobile
# 或
open -a Xcode.app out/mac_debug/all.xcworkspace
4.3. Android
Install dependencies
On Ubuntu or Debian, install build dependencies by running the script under webrtc/src/build:
./build/install-build-deps.sh
Generate project
# arm
gn gen out/Debug --args='target_os="android" target_cpu="arm"'

# arm64
gn gen out/Debug --args='target_os="android" target_cpu="arm64"'

# x86
gn gen out/Debug --args='target_os="android" target_cpu="x86"'

# x64
gn gen out/Debug --args='target_os="android" target_cpu="x64"'
Debug is the default. For release, add
is_debug=false. See end of article for more options. {: .prompt-info }
Generate Android Studio project (optional)
# Import the project in Android Studio. (Do not just open it.) The project is located in out/Debug/gradle.
build/android/gradle/generate_gradle.py --output-directory $PWD/out/Debug \
--target "//examples:AppRTCMobile" --use-gradle-process-resources \
--split-projects
Build
ninja -C out/Debug
Android code can be downloaded on macOS, but official builds are supported only on Ubuntu. For building on macOS, see here. {: .prompt-info }
4.4. Windows
Generate project
gn gen out/Debug --args="target_os=\"win\" target_cpu=\"x64\" is_component_build=false rtc_enable_protobuf=true rtc_use_h264=true rtc_initialize_ffmpeg=true ffmpeg_branding=\"Chrome\" rtc_include_tests=false " --ide=vs2015
Build
ninja -C out/Debug
# 或使用vs打开工程编译
Reference: Widows编译WebRTC
5. Build Arguments
List all build arguments for a generated output directory, e.g. out/ios:
gn args out/ios --list
Common gn arguments to reduce build time and binary size:
# 开启rtti, 默认开启
use_rtti=true
# 开启debug, 默认开启
is_debug=true
# 开启h264编码
is_component_build=false
rtc_use_h264=true
# 开启protobuf
rtc_enable_protobuf=true
 # 是否编译测试代码,默认true
rtc_include_tests=false
 # 是否编译示例代码,默认true
rtc_build_examples=false

proprietary_codecs=true

rtc_enable_sctp=false
# 禁用libevent
rtc_enable_libevent=false
# 指定ffmepg 版本
ffmpeg_branding="Chrome"
#
rtc_build_tools=false
# 禁用android lint
disable_android_lint=false
 #禁用 webrtc自带的libc++库,防止和标准库冲突,如果编译动态库可以打开
use_custom_libcxx=false
#使用非 webrtc自带的libc++库,防止和标准库冲突
use_custom_libcxx_for_host=true
 # 仅针对安卓
android32_ndk_api_level=18
 # 仅针对iOS和Mac,启用签名
ios_enable_code_signing=false
 # 编译警告当错误处理
treat_warnings_as_errors=true
# 开启libaom,AV1编码
enable_libaom=true
 # 开启libvpx,VP9编码
rtc_libvpx_build_vp9=false
# 生成DSYM文件, 防止Mac和iOS断点不停止问题
enable_dsyms=true